
Blog
How to Crochet for Absolute Beginners: A Simple Weekend Guide
Did you know that learning to crochet can be more than just a creative hobby? Many people report significant improvements in their mental health after picking up crochet for beginners as their chosen craft.

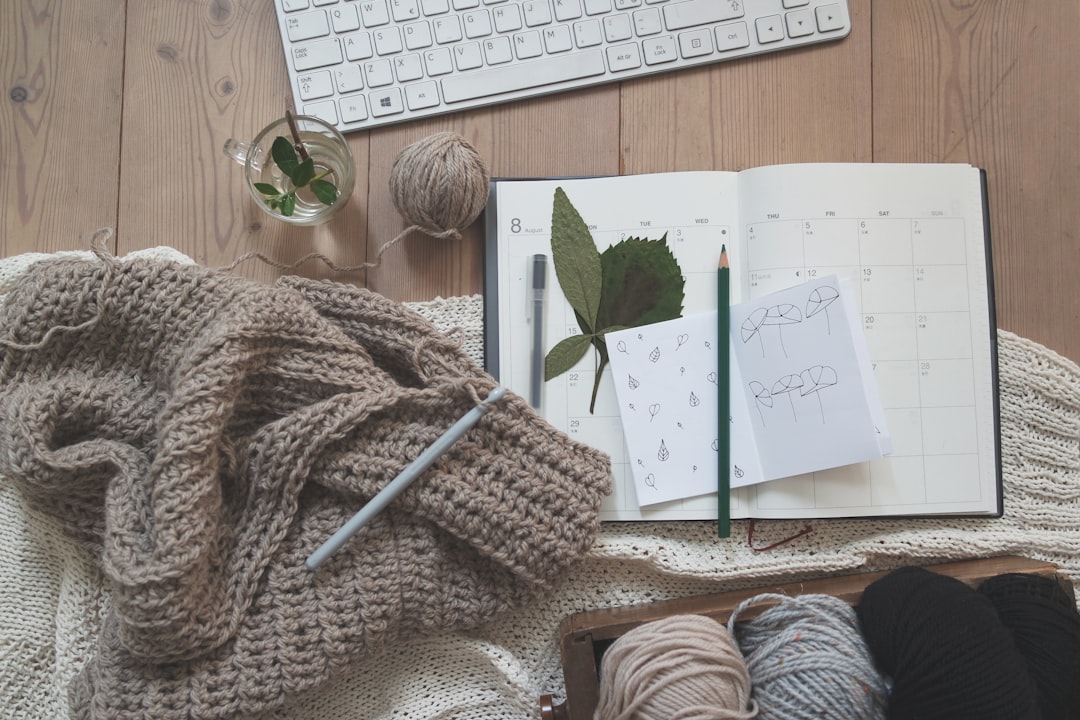
Not only is crochet a popular hobby worldwide, but it's also incredibly accessible. Whether you're dreaming of creating cozy blankets, stylish scarves, or intricate lacework, the process can be broken down into simple, manageable steps. With just some basic tools - a hook and yarn - you can start your crochet journey today.
We'll guide you through everything you need to know about how to crochet for beginners step by step with pictures. From choosing the right supplies (like a 5.5mm hook and medium-weight yarn) to mastering basic stitches, this weekend guide will help you start creating your first project with confidence. Let's begin!
Essential Crochet Supplies for Beginners
Starting your crochet journey requires just a few basic supplies. Getting the right tools from the beginning makes learning substantially easier and more enjoyable. Let's explore everything you'll need to begin crocheting this weekend!
Choosing the right yarn for beginners
The yarn you select significantly impacts both your learning experience and your finished project. As a beginner, I recommend focusing on specific characteristics rather than getting overwhelmed by all the options.
Medium-weight yarn (also called worsted weight or category 4) is ideal for beginners. This thickness provides excellent visibility of your stitches while still being manageable to work with. When learning basic techniques, opt for smooth, light-colored yarn that doesn't split easily, as this helps you see your stitches.
For your first project, consider these yarn types:
Acrylic yarn makes an excellent beginner choice because it's affordable and comes in numerous colors. Since you'll likely unravel your work multiple times while learning, choosing budget-friendly yarn minimizes costs.
Cotton yarn features a silky smooth texture that glides easily on crochet hooks, although it's less stretchy than other options. It's particularly good for kitchen items like dishcloths.
Wool yarn has a forgiving nature that makes learning different crochet stitches easier. It's warm and allows for temperature regulation, making it perfect for scarves and winter accessories.
Stay away from yarn with excessive texture, dark colors, or very thin weights until you've mastered the basics. Additionally, bamboo yarn (weight 3) can be difficult for absolute beginners to work with.
Finding the perfect hook size
Crochet hooks come in various sizes identified by either letters (US system) or numbers (UK/metric system). The size you need corresponds to your yarn weight - thicker yarn requires larger hooks, while thinner yarn needs smaller ones.
For beginners working with worsted weight yarn, an H-8 (5mm) hook is typically recommended. Furthermore, if you're using bulky yarn (category 5), you might want a larger hook like a J-10 (6mm).
When starting, consider hook material as well. Metal hooks are budget-friendly, lightweight, and often good starting points for beginners. They're durable and allow yarn to glide smoothly.
To build a beginner-friendly collection, consider hooks ranging from sizes E-J (US) or 3.5 mm- 7 mm (UK). Many crocheters eventually purchase sets with different sizes, but initially, you might prefer acquiring one or two hooks at a time.
Other helpful tools to have on hand
Besides yarn and hooks, several additional tools will make your crocheting experience smoother:
- Tapestry needles: These blunt-tipped needles help weave in ends and sew pieces together. Choose a size that allows your yarn to fit through the eye.
- Stitch markers: Small clips or rings that mark specific places in your work, especially useful when crocheting in rounds.
- Scissors: Dedicated crafting scissors make cutting yarn easier and prevent you from searching through kitchen drawers.
- Measuring tape: A flexible tape measure helps check project dimensions and ensure consistent sizing.
While not essential for beginners, these "nice-to-have" items can enhance your experience as you progress:
A project bag keeps your supplies organized, while a yarn bowl prevents your ball from rolling away. Subsequently, as your skills advance, you might consider additional tools like blocking mats, row counters, or pattern books.
Remember, crochet requires minimal investment to begin. Start with quality basics and add specialized tools as your skills and interests develop. Having the right supplies from the beginning sets you up for success and makes the learning process significantly more enjoyable.
How to Hold Your Crochet Hook and Yarn
Finding your perfect grip and tension is a crucial first step in your crochet journey. Unlike knitting, which requires two needles, crochet needs just one hook and your hand to control the yarn. Let me guide you through holding these essential tools comfortably so you can focus on creating beautiful stitches.
The pencil grip method
As the name suggests, this method involves holding your crochet hook similar to how you would hold a pencil when writing. To achieve this grip:
- Rest your hook between your thumb and index finger
- Place your thumb on the flat part (grip) of the hook
- Position your index finger on the hook above your thumb
- Use your middle finger at the back for added support
- Let the rest of the hook rest along the side of your hand
The pencil grip offers remarkable precision and control, making it ideal for intricate projects with detailed patterns. Many crocheters prefer this method when working on complex designs that require meticulous attention to detail. Moreover, this grip allows for swift and efficient yarn scooping, helping you see your projects come to life more quickly.
If you find yourself working on projects with numerous stitches or detailed designs, the pencil grip might become your preferred method. Think of it as using a fine-tipped pen for detailed artwork – it gives you the ability to maneuver with greater accuracy.
The knife grip method
The knife grip, sometimes called the overhand grip, resembles how you would hold a knife when cutting food. To use this method:
- Hold your hook with all fingers wrapped around it
- Rest the hook inside your palm
- Extend your index finger and thumb
- Keep your thumb on the flat part (grip) of the hook
- Use your fingers to hold the hook in place
This grip is widely adopted by beginners due to its comfortable and looser hold. Indeed, the knife grip provides a more natural alignment for your wrist, reducing awkward positions that might cause discomfort during extended crocheting sessions. The relaxed hand position minimizes strain, allowing you to focus on the joy of creating rather than hand fatigue.
For those concerned about wrist pain, the knife grip often provides welcome relief. The comfortable, looser hold means less tension in your hand and wrist, making longer crocheting sessions more enjoyable.
Remember, there is absolutely no right or wrong way to hold your hook. The golden rule is to choose whichever method feels most comfortable for you. Some crocheters even develop their unique grip that combines elements of both methods!
Finding the right tension for your yarn
Tension refers to the stress applied to your yarn as you work, and it's often considered one of the most challenging aspects for crochet beginners. Nevertheless, with practice, you'll develop a feel for what works best.
Your tension shouldn't be too tight or too loose – aim for that "just right" balance. Proper tension significantly impacts your finished project's appearance. Essentially, if your tension is too tight, your project will turn out smaller and stiffer than intended. Conversely, if it's too loose, your work will be larger with noticeable holes.
Here are three common ways to hold your yarn for proper tension:
Basic Method: Hold the yarn between your pointer and middle fingers, controlling tension by squeezing these fingers together or releasing slightly when pulling the yarn.
Weaving Method: For more control, weave the yarn under your little finger, over your ring finger, under your middle finger, and over your index finger. This method naturally creates more tension and is excellent for loose crocheters.
Wrap Method: For a simpler approach, wrap the yarn around your pinky, bring it over your three middle fingers (ring, middle, and index), then hold it between your thumb and index finger.
Whichever method you choose, ensure the yarn flows smoothly when pulled. The working strand should be taut but not overly tight, just like Goldilocks would want it. Test your tension by pulling on the yarn; adjust by repositioning your fingers if needed.
Remember that your preferred method might change depending on the yarn weight or project type. Consistency within a single project is key – avoid changing your holding technique mid-project to maintain even stitches throughout.
As with most aspects of crochet for beginners, finding your perfect tension takes practice. Don't be discouraged if your early projects have uneven stitches – this is completely normal and improves with experience!
Starting Your First Crochet Stitches
Now that you have your supplies ready and know how to hold your hook and yarn, it's time to begin the actual crocheting! Every crochet project starts with two fundamental techniques: creating a slip knot and making a foundation chain. These first steps form the backbone of almost every crochet project you'll ever make.
Making a slip knot
The slip knot is your very first step in crochet for beginners—it's how you secure the yarn to your hook before starting any project. Here's a simple way to create one:
- Begin by laying your yarn down and creating a loop, making sure the short end (tail) sits on top of the longer working yarn
- Flip the entire loop downward onto the longer yarn strand
- Pinch the middle yarn between your thumb and forefinger
- Gently pull this middle section to create a new loop
- Hold onto the tail end while pulling the loop tight
Your slip knot should be secure but not overly tight—you'll need to be able to slide your hook through it comfortably. Think of it as the anchor point for all your future stitches. Once complete, insert your hook through this loop and gently tighten the knot around the hook.
Creating a foundation chain
After securing your slip knot, you're ready to create your foundation chain—often called a starting chain. This chain forms the base of your project, and almost all crochet patterns begin with this step:
- Hold your hook with the slip knot already attached
- Wrap the working yarn around your hook from back to front (this is called "yarning over")
- Use your hook to catch this wrapped yarn
- Pull the caught yarn through your slip knot loop
- You've just created your first chain stitch!
Continue repeating steps 2-4 until you have the number of chain stitches required by your pattern. Remember to keep your tension consistent—not too loose and not too tight. Chains that are too tight will be difficult to work iwithlater, whereas chains that are too loose will create gaps in your project.
For absolute beginners, I recommend practicing until you can create chains with even, consistent stitches. A basic washcloth using single crochet stitches makes an excellent first project, requiring only chain stitches and single crochet.
Understanding chain anatomy
Looking at your completed chain, you'll notice it has distinct parts—understanding these components is crucial when you begin working on your chain:
Each chain stitch has three potential loops you can work into:
- Front loop (FL): The loop closest to you on the top of the stitch
- Back loop (BL): The loop furthest from you on the top of the stitch
- Back bump (BB): A bump on the back side of the chain (you'll need to turn your chain over to see it)
Which loop you choose to work into affects both how easy it is to crochet your next row and how your finished edge will look. For instance, working into the back bump only creates a finished edge that mirrors the top edge of your project—ideal for projects without edging, like dishcloths.
Alternatively, working into both the front and back loops creates a very strong foundation, though many beginners find this method the most challenging. Meanwhile, working through only the back loop was traditionally taught to new crocheters.
As you start learning to crochet, experiment with different ways of working into your chain to discover which method you prefer. Above all, be consistent throughout your project for the best results.
Basic Crochet Stitches Step by Step
With your foundation chain complete, we can explore the essential crochet stitches that will form the building blocks of your projects. These four fundamental techniques appear in virtually every pattern you'll encounter as you learn to crochet. Let's break them down into manageable steps!
Single crochet stitch (US) / Double crochet (UK)
The single crochet stitch creates a dense, sturdy fabric perfect for scarves, baby blankets, and hats. In patterns, you'll see this abbreviated as sc.
To make a single crochet stitch:
- Insert your hook into the second chain from the hook
- Yarn over and pull through the chain (you'll have two loops on your hook)
- Yarn over again and pull through both loops on your hook
- That's one single crochet complete!
Continue working one single crochet into each chain across your foundation. For subsequent rows, chain one stitch before turning your work. This serves as your turning chain, bringing your yarn to the correct height.
Half double crochet (US) / Half treble (UK)
The half double crochet sits between single and double crochet in height. It works up quickly while maintaining good structure and is typically abbreviated as hdc in patterns.
To create a half double crochet:
- Yarn over before inserting your hook into the third chain from the hook
- Yarn over again and pull through the chain (you'll have three loops on your hook)
- Yarn over once more and pull through all three loops at once
For half double crochet rows, chain two before turning your work. This stitch creates a versatile fabric that's ideal for blankets, textured bags, and scarves.
Double crochet (US) / Treble crochet (UK)
Double crochet is a relatively tall stitch that works up quickly. It creates a more flexible fabric than single crochet and is abbreviated as dc in US patterns.
To work a double crochet stitch:
- Yarn over before inserting your hook into the fourth chain from the hook
- Yarn over and pull through the chain (you'll have three loops on your hook)
- Yarn over and pull through the first two loops only (two loops remain)
- Yarn over again and pull through the final two loops
For double crochet rows, chain three before turning—this counts as your first stitch in most patterns. This versatile stitch appears in countless designs, from afghans to granny squares.
Slip stitch and its use.s
The slip stitch is the shortest and simplest crochet stitch, abbreviated as sl st. Unlike the previous stitches, it doesn't add height to your work.
To make a slip stitch:
- Insert your hook into the stitch or chain
- Yarn over and pull directly through both the stitch AND the loop on your hook in one motion
The slip stitch serves multiple purposes:
- Joining rounds when crocheting in circles
- Moving yarn across a row without adding height
- Creating flat, nearly invisible stitches
- Finishing edges with a clean look
- Adding decorative elements to your work
As you practice these stitches, remember that tension is key. Your first attempts might look uneven—this is perfectly normal! I recommend creating small swatches of each stitch type to build muscle memory.
To practice effectively, try making a simple dishcloth using a single stitch type. Consequently, as you become comfortable with the basics, you can combine stitches to create textured fabrics and more complex patterns. Ultimately, these four fundamental stitches serve as the foundation for virtually all crochet projects you'll ever make.
Common Beginner Mistakes and How to Fix Them
Even experienced crocheters make mistakes, so don't be discouraged when you encounter challenges in your early projects. Learning to identify and fix common issues is an essential part of mastering crochet for beginners. Let's explore the most frequent pitfalls and practical solutions.
Uneven tension problems
Inconsistent tension is perhaps the most common beginner frustration in crochet. You might notice your project developing a "bubbling effect" in certain areas where your tension has changed. This typically happens as your hands get tired or as you become more comfortable with the motion.
To fix uneven tension:
- Practice maintaining consistent pressure on your yarn
- Try a slightly larger hook for your foundation chain if it's consistently too tight
- Take breaks to prevent hand fatigue
- Consider using a yarn guide to help maintain consistent tension
For a quick fix on an existing project with tension issues, blocking (dampening and reshaping) can help even out minor inconsistencies after completion.
Losing or adding stitches
Noticing your project mysteriously growing wider or narrower? You're likely accidentally adding or dropping stitches along the way. This happens when you either miss a stitch or create an extra one without realizing it.
To prevent this common issue:
- Count your stitches at the end of each row
- Use stitch markers every 10 stitches to help track your count
- Pay special attention to the first and last stitches in each row
- Double-check where your first stitch should go after turning
For beginners working with single crochet, remember that your first stitch goes into the first stitch of the previous row, while other basic stitches often place the first actual stitch in the second stitch of the previous row.
How to frog (undo) your work
"Frogging" refers to ripping out stitches you've already crocheted. It gets its name from the "rip it, rip it" sound that mimics a frog's croak. Fortunately, crochet is much easier to frog than knitting, allowing you to quickly fix mistakes.
To frog your work:
- Simply pull your hook out
- Gently tug the working yarn end
- Watch as the stitches unravel row by row
- Stop at the point where you want to begin again
- Reinsert your hook and continue crocheting
If you're concerned about unraveling too far, insert a stitch marker at the point where you want to stop frogging. Generally, patient and gentle pulling works best, as yanking can create knots, especially with certain yarn types.
Reading your crochet to spot errors
Learning to "read" your crochet means understanding what your stitches should look like so you can catch mistakes early. This skill primarily comes with practice, but drastically improves your results.
When examining your work:
- Check that your edges remain straight (unless the pattern specifies otherwise)
- Look for any stitches that appear unusually large or small
- Verify that patterns and textures appear consistent
- Count stitches regularly
Taking time to analyze each row as you work saves countless hours of frustration. If you're just ststartinggive yourself permission to make mistakes and learn from them. As one crochet teacher notes, "Nothing breaks my heart more than seeing someone give up before they've given it a proper go."
Finishing Your First Crochet Project
Completing your first crochet piece marks an exciting milestone in your crafting journey. The finishing touches you add will transform your work from a simple project into a polished creation that looks professional and lasts longer.
Fastening off properly
After completing the last stitch of your project, you'll need to secure your work to prevent unraveling. This process, called "fastening off," is straightforward:
- Cut the yarn, leaving a 6-inch tail
- Yarn over and pull this tail completely through the loop on your hook
- Remove your hook and gently tug the yarn tail to tighten the knot
Accordingly, this creates a secure knot at the end of your work. Some crocheters prefer an alternative method that uses a chain stitch for extra security, albeit with a more visible knot. Regardless of which method you choose, always leave a sufficient tail for weaving in later.
Weaving in ends neatly
Those loose yarn tails need to be hidden within your project—a process called "weaving in ends." To do this properly:
- Thread your yarn tail onto a blunt-tipped tapestry needle
- Weave through several stitches in one direction
- Change direction and weave back through different parts of those same stitches
- Repeat in a third direction for extra security
The secret to ends that stay put? Changing directions as you weave. This creates a secure anchor that won't come undone even with washing and wear. After weaving, gently pull to adjust the tension, then snip the remaining tail close to your work.
Simple blocking techniques
Blocking is a finishing method that shapes and evens out your project using moisture. There are three primary approaches:
Spray blocking is ideal for beginners and minor adjustments. Simply spritz your project with water, shape it gently with your hands, and allow it to dry flat.
Full wet blocking involves completely submerging your project in water for 15-30 minutes. Thereafter, carefully squeeze out excess moisture (never wring!), roll in a towel to remove more water, then pin it to shape while drying.
Steam blocking works particularly well for acrylic yarns. Hold a steamer or iron (without touching!) above your project to allow steam to penetrate the fibers, then shape and let dry.
Primarily, blocking helps even out tension issues and enhances stitch definition, making your finished piece look remarkably more professional.
Conclusion
Learning crochet opens up endless creative possibilities while requiring just a few basic tools and techniques. Starting with quality supplies, mastering fundamental stitches, and practicing proper tension will build a strong foundation for your crochet journey.
Remember that every crocheter faces challenges at first. Your initial projects might show uneven stitches or tension issues - these are normal parts of the learning process. Focus on understanding each technique thoroughly before moving to more complex patterns.
Most importantly, give yourself time to develop muscle memory and confidence with basic stitches. Practice makes progress, and each project helps refine your skills. Armed with this beginner's guide, you now have everything needed to start creating beautiful handmade items through crochet.
Take pride in completing your first project, whether it's a simple dishcloth or a cozy scarf. Each stitch brings you closer to mastering this rewarding craft that combines creativity, relaxation, and the satisfaction of making something with your own hands.


